How to turn on geo-tag photos for evidence collection
Geo-Tagged photos are mandatory as a part of the evidence collection pack in most of the solutions we offer.
Follow these steps to turn on Geo-Tag photos on your iPhone:
Step 1
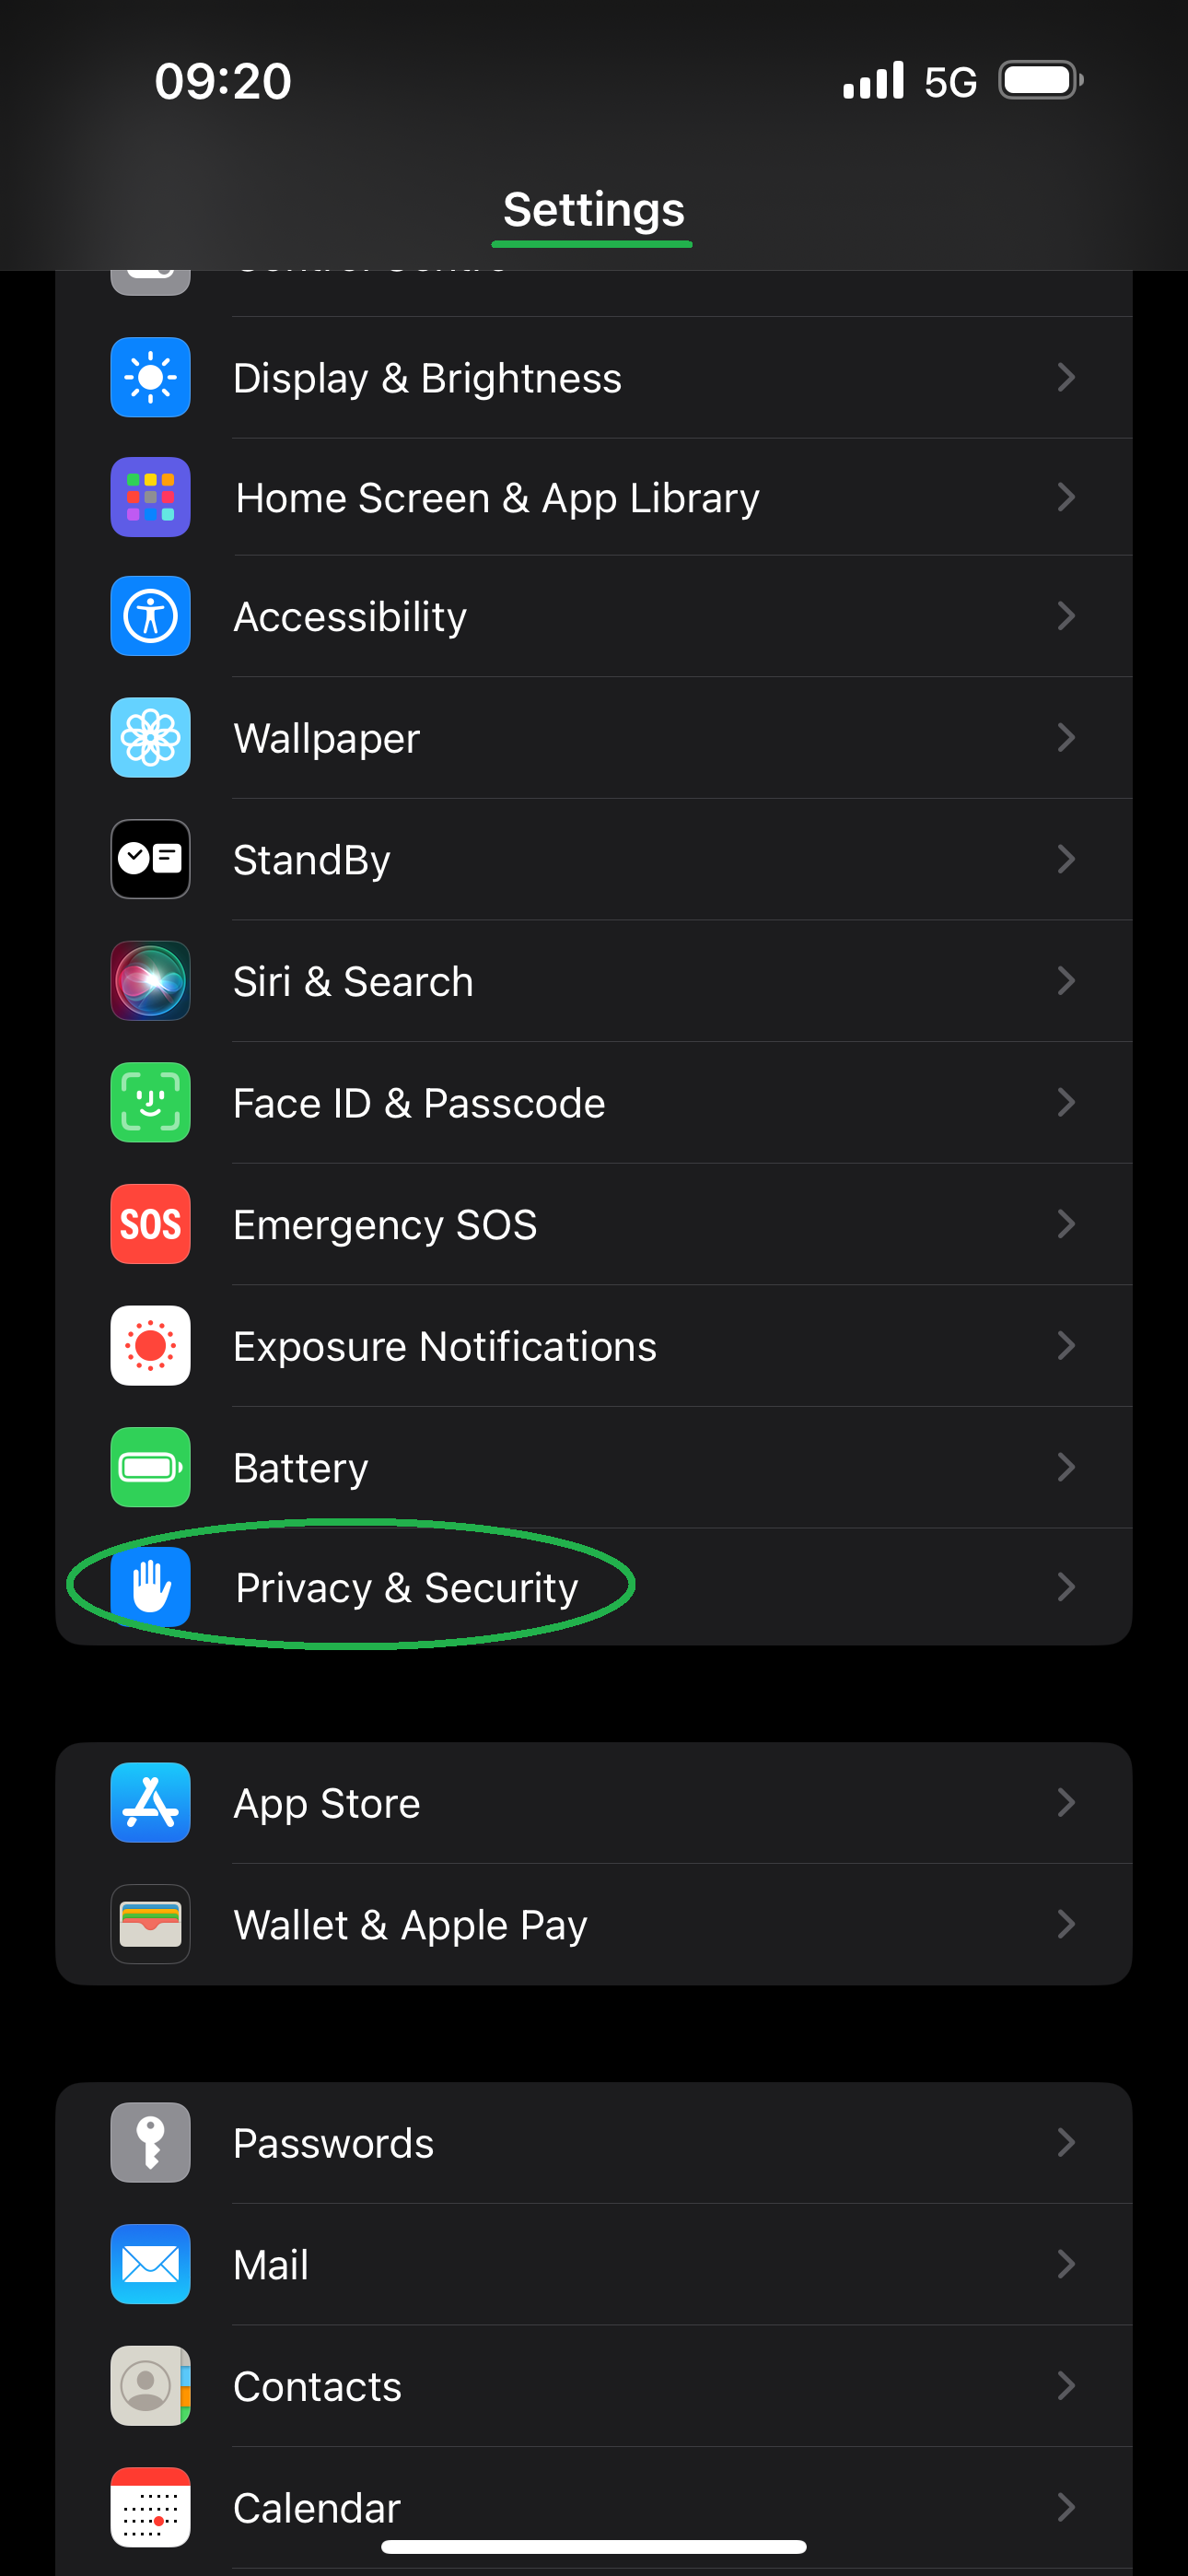
Go to the “Settings” on your phone. Then, tap the “Privacy & Security” section.
Step 2
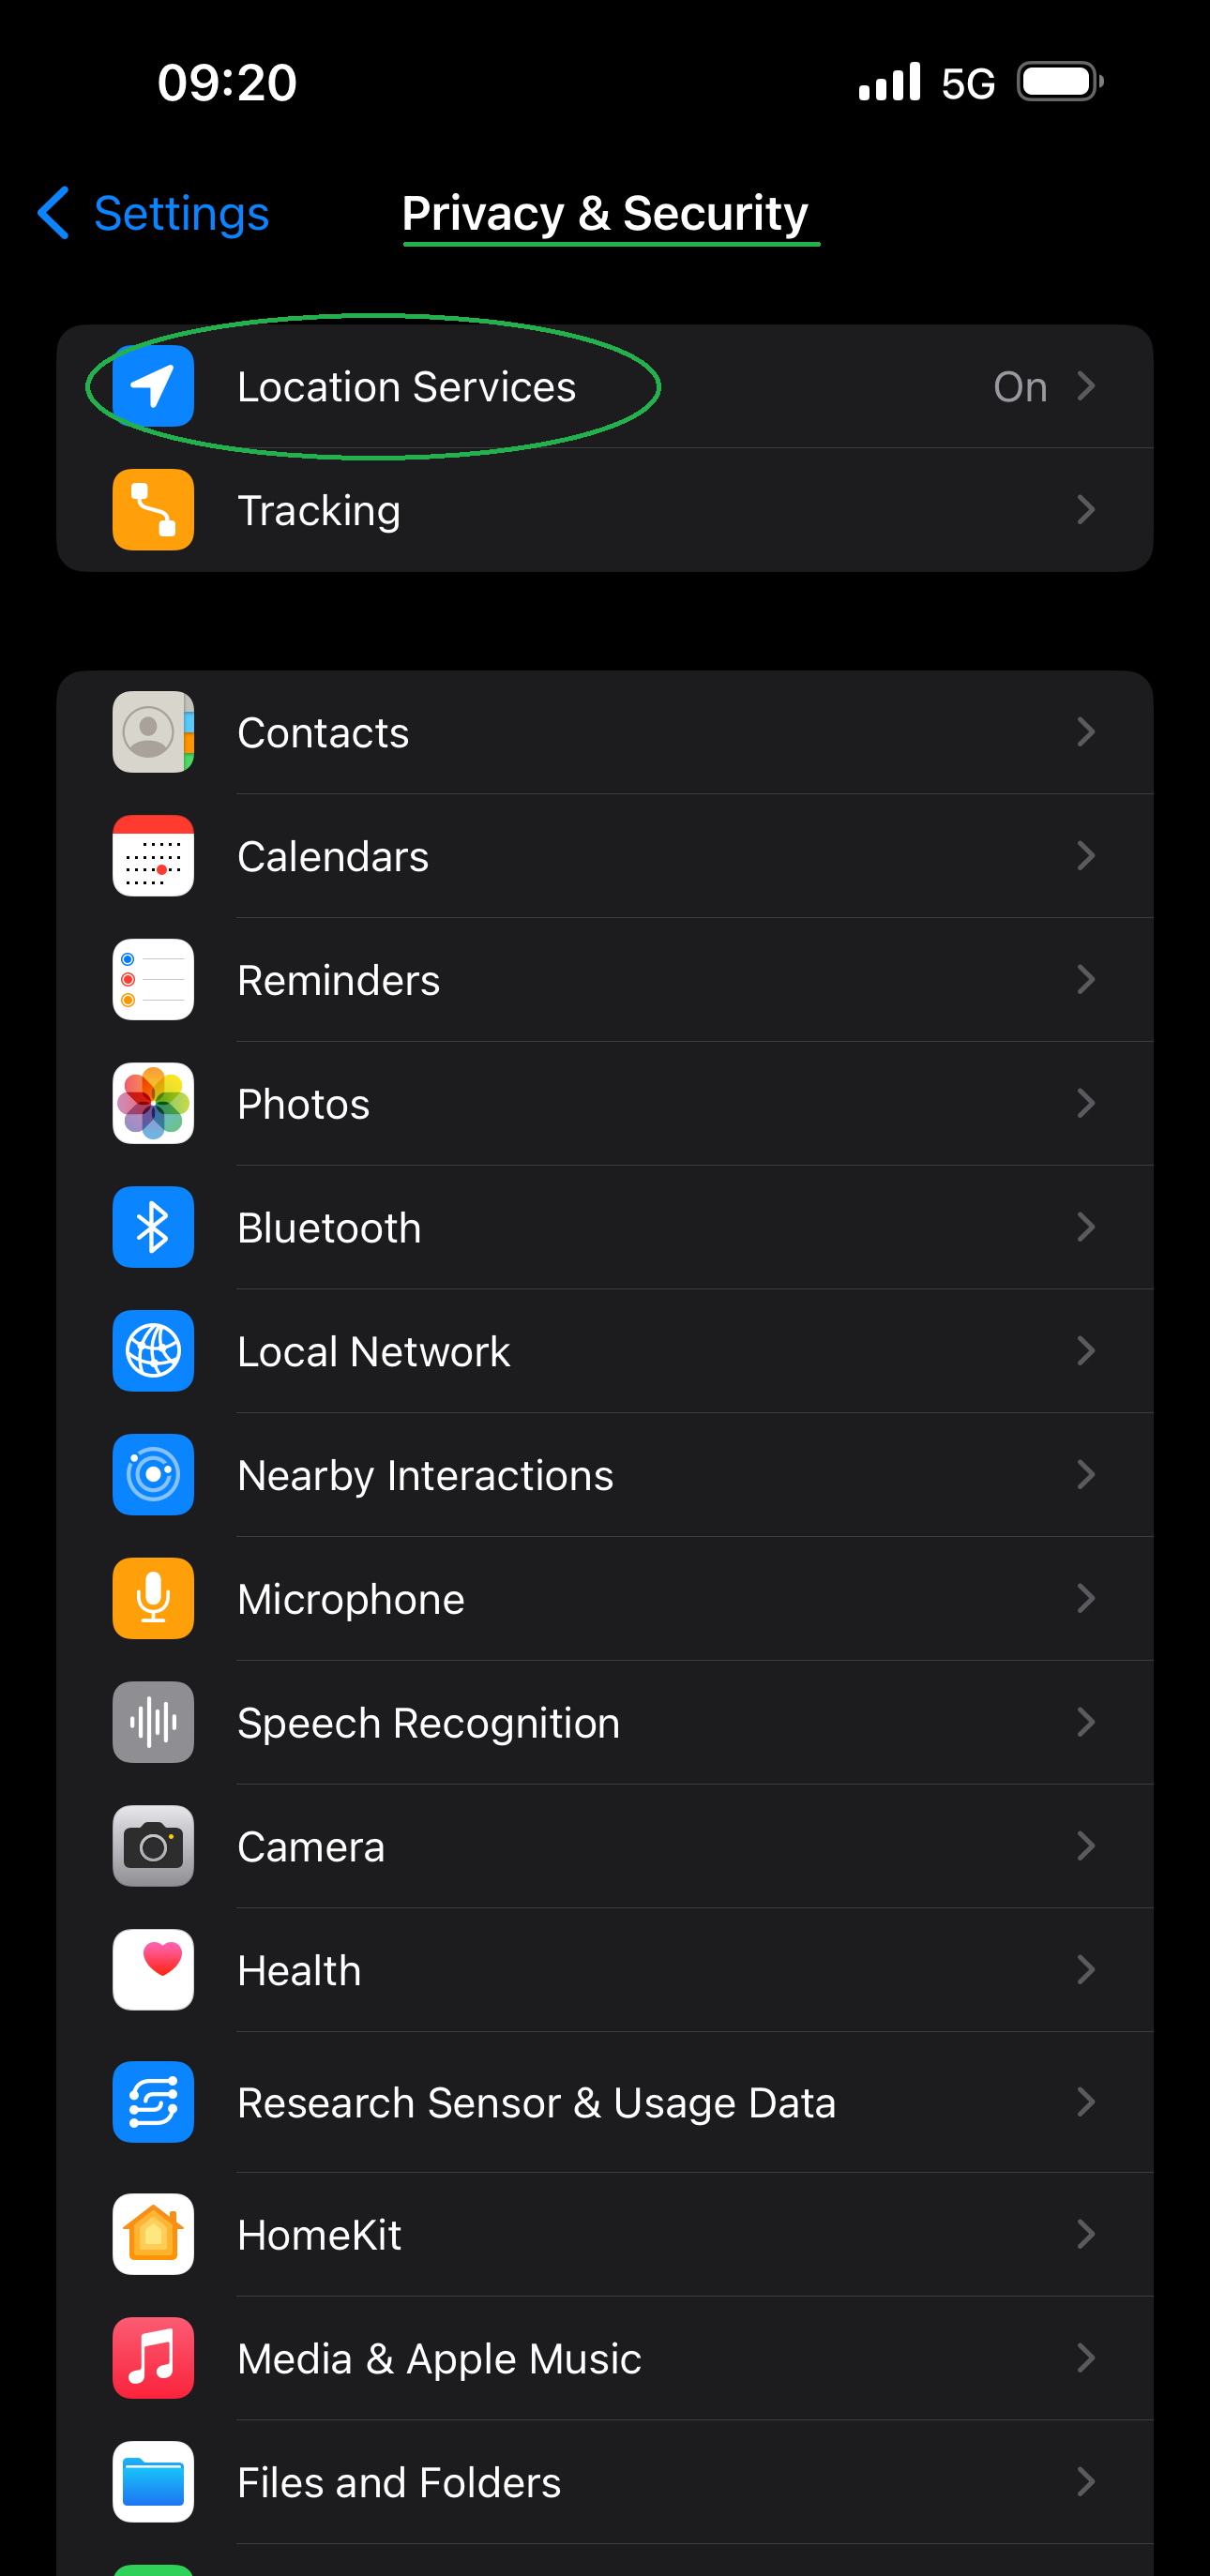
On “Privacy & Security”, click on “Location Services”.
Step 3
Turn the Toggle on and click on “Camera”
Step 4
On “Location Services”, turn the Location Services toggle on, and then click on “Camera” and/or any other app you use to take photos. If you use more than one app to take photos, please repeat steps 3 and 5 to enable location services while using all apps you use to take photos.
Step 5
Now you have to make sure that photos are captured in the JPEG format. To do so: click on “Settings”, then “Camera”.
Step 6
Click on “Formats”. Then, click on “Most Compatible” and make sure it’s ticked.
Step 7
Click on “Most Compatible” and make sure it’s ticked.
Follow these steps to turn on Geo-Tag photos on your Android:
Step 1
Go to the “Settings” on your phone. Then, tap the “Location” section.
Step 2
Make sure that “On is toggled and click on “App Permissions”
Step 3
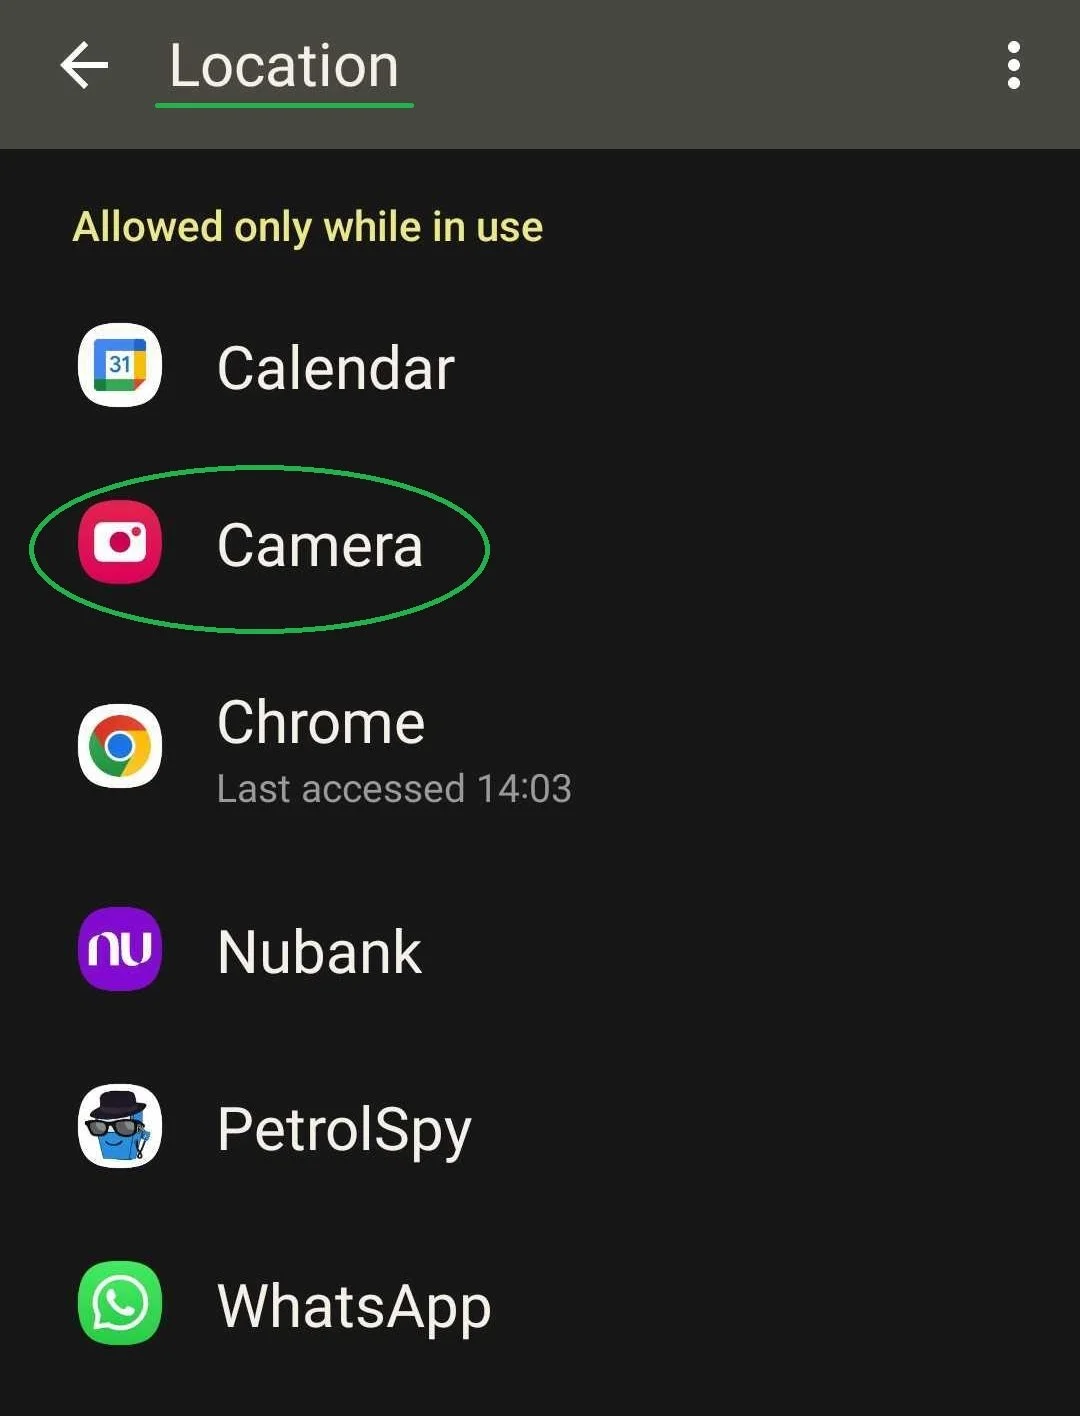
Click on “Camera”
Step 4
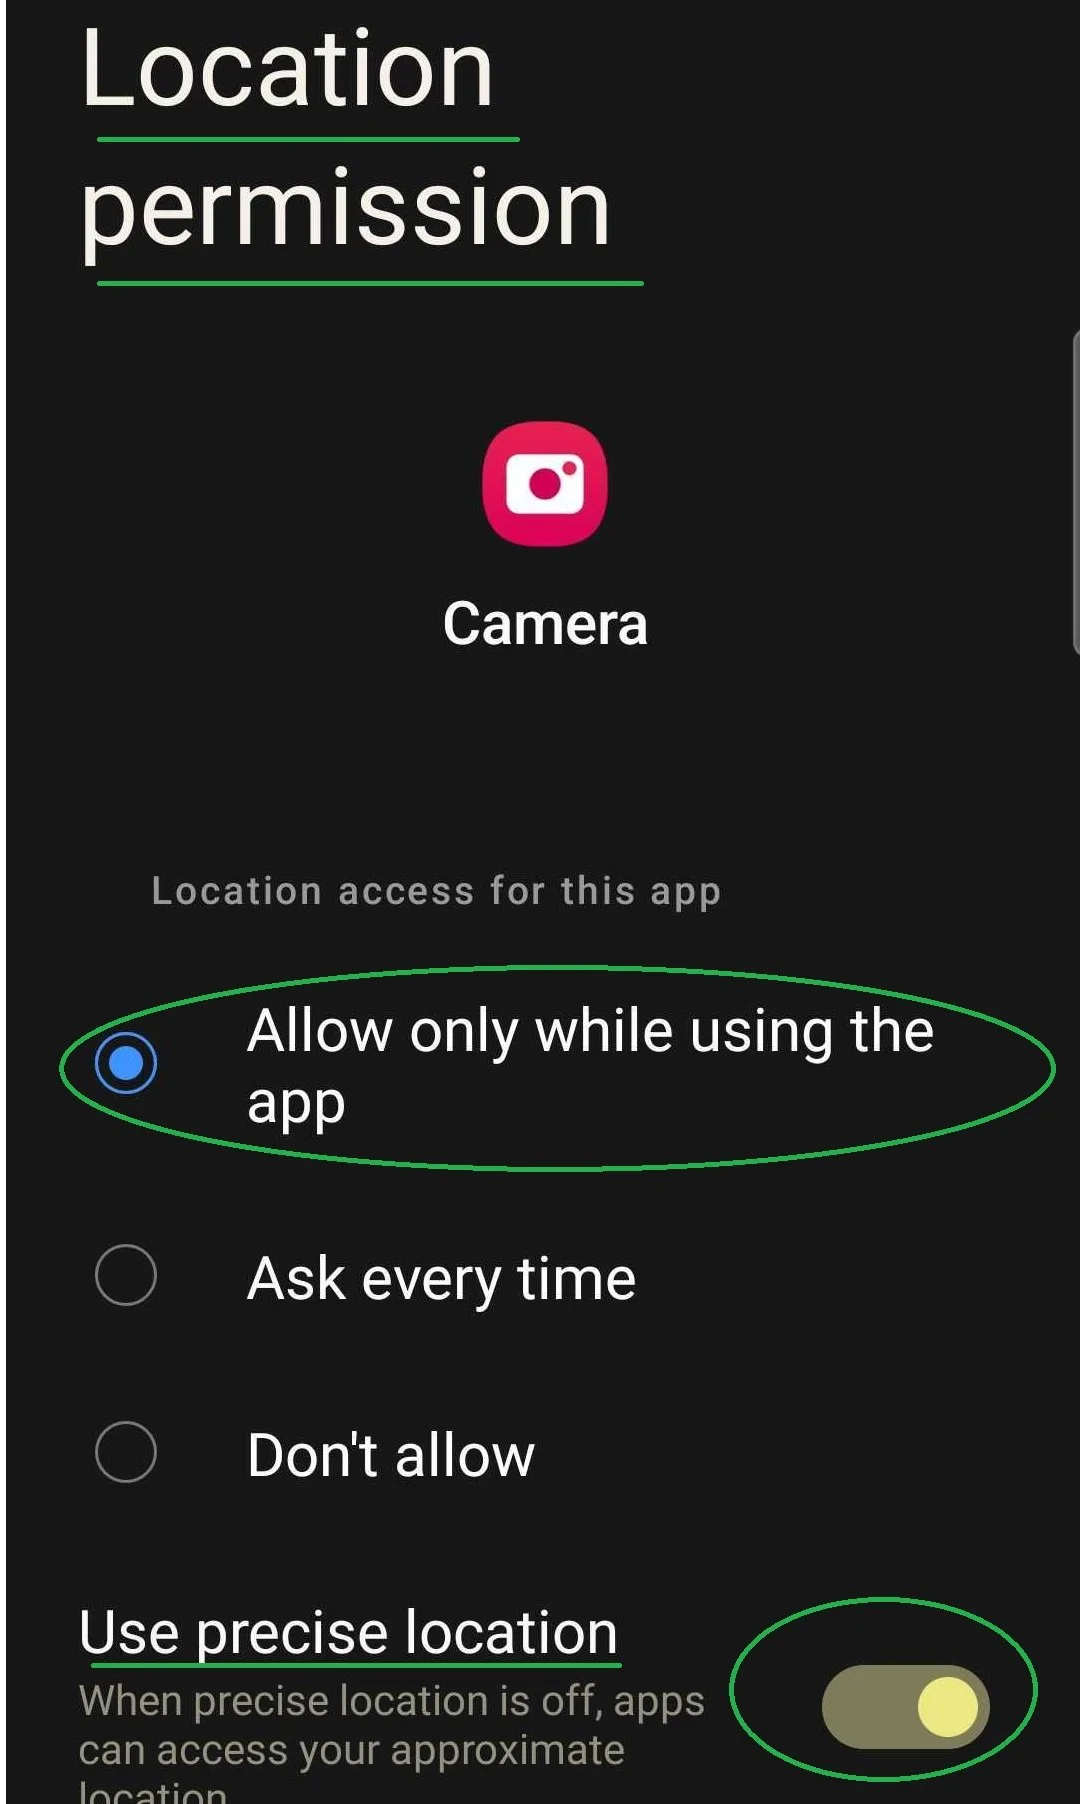
Check “Allow only hile using the app” and turn on the toggle for “Use precise location”
PS: There are a few different Android Operational Systems in the market. The steps may vary slightly from user to user.


